Planning and storyboarding are crucial steps in creating a successful video project, whether it's a short film, documentary, promotional video, animated film, motion graphics, or any other type of video content. Here are some steps to help you effectively plan and storyboard your video project, along with insights into different types of storyboard shots and camera angles:
-
Define Your Objectives:
- Start by clarifying the purpose and goals of your video. What do you want to achieve with this project? Who is your target audience? What message do you want to convey?
-
Research and Conceptualize:
- Then research similar videos or content to get inspiration and understand what works. Develop a clear concept for your video, including the key themes and ideas you want to explore. In order to do so, I like to create a mood board on Pinterest to be the North Star that guides the project.
-
Create a Script:
- Meanwhile, write a script that outlines the dialogue, narration, and action in your video. A well-structured script will serve as the foundation for your storyboard. The script should be about 80% locked (hey, there are always rewrites, no worries) before beginning on the storyboard.
-
Identify Key Scenes and Shots:
- Afterwards, break down your script into key scenes and shots. Think about the visual elements, camera angles, and locations needed to tell your story effectively. I like to do this with a split script. This splits the script into a two-column document. On one side is all the dialogue from the scenes and shots, and on the other side is the shot description, action direction, and storyboard notes.
-
Create a Shot List:
- Develop a shot list that specifies each shot you plan to capture. Include details like the camera angle, shot type (wide, medium, close-up), camera movement, and any necessary props or actors.
Types of Storyboard Shots:
- Wide Shot (WS): This shot includes a wide view of the scene, capturing a broad area. It's great for establishing a location or showing a character's position in their surroundings.
- Medium Shot (MS): A medium shot focuses on the subject from the waist up. It's often used for conversations and showing more detail while still providing context.
- Close-Up (CU): A close-up shot frames a specific part of the subject, like their face. It's used to emphasize emotions, reactions, or details.
- Extreme Close-Up (ECU): Obviously, this is an even closer shot, often focusing on a specific feature, like an eye or a hand.
- Over-the-Shoulder Shot (OTS): This shot is taken from behind one character's shoulder, capturing the perspective of another character in the scene.
-
Shot Order:
- The typical order of storyboard shots for a scene, starting with a wide shot, often follows a progression that moves from a wide view to progressively closer and more detailed shots. For an example, here's a brief description of the common sequence:
-
Wide Shot (WS):
The scene opens with a wide shot to establish the location and provide context. It shows the overall setting and the placement of characters and objects.
-
Medium Shot (MS):
After the wide shot, a medium shot is used to focus on the characters or subjects within the scene. It provides a closer view while still showing some background.
-
Close-Up (CU):
Following the medium shot, close-up shots are used to emphasize the characters' emotions, reactions, or specific details. These shots create a stronger connection with the characters.
-
Extreme Close-Up (ECU):
In some cases, an extreme close-up may be employed to highlight a particular facial expression, gesture, or object with great detail.
This sequence, starting from a wide shot and moving closer to the subjects, is a common storytelling technique to draw the viewer into the scene, establish context, and create emotional engagement. However, the specific shot progression may vary based on the director's creative choices (or yours) and the requirements of the scene.
-
-
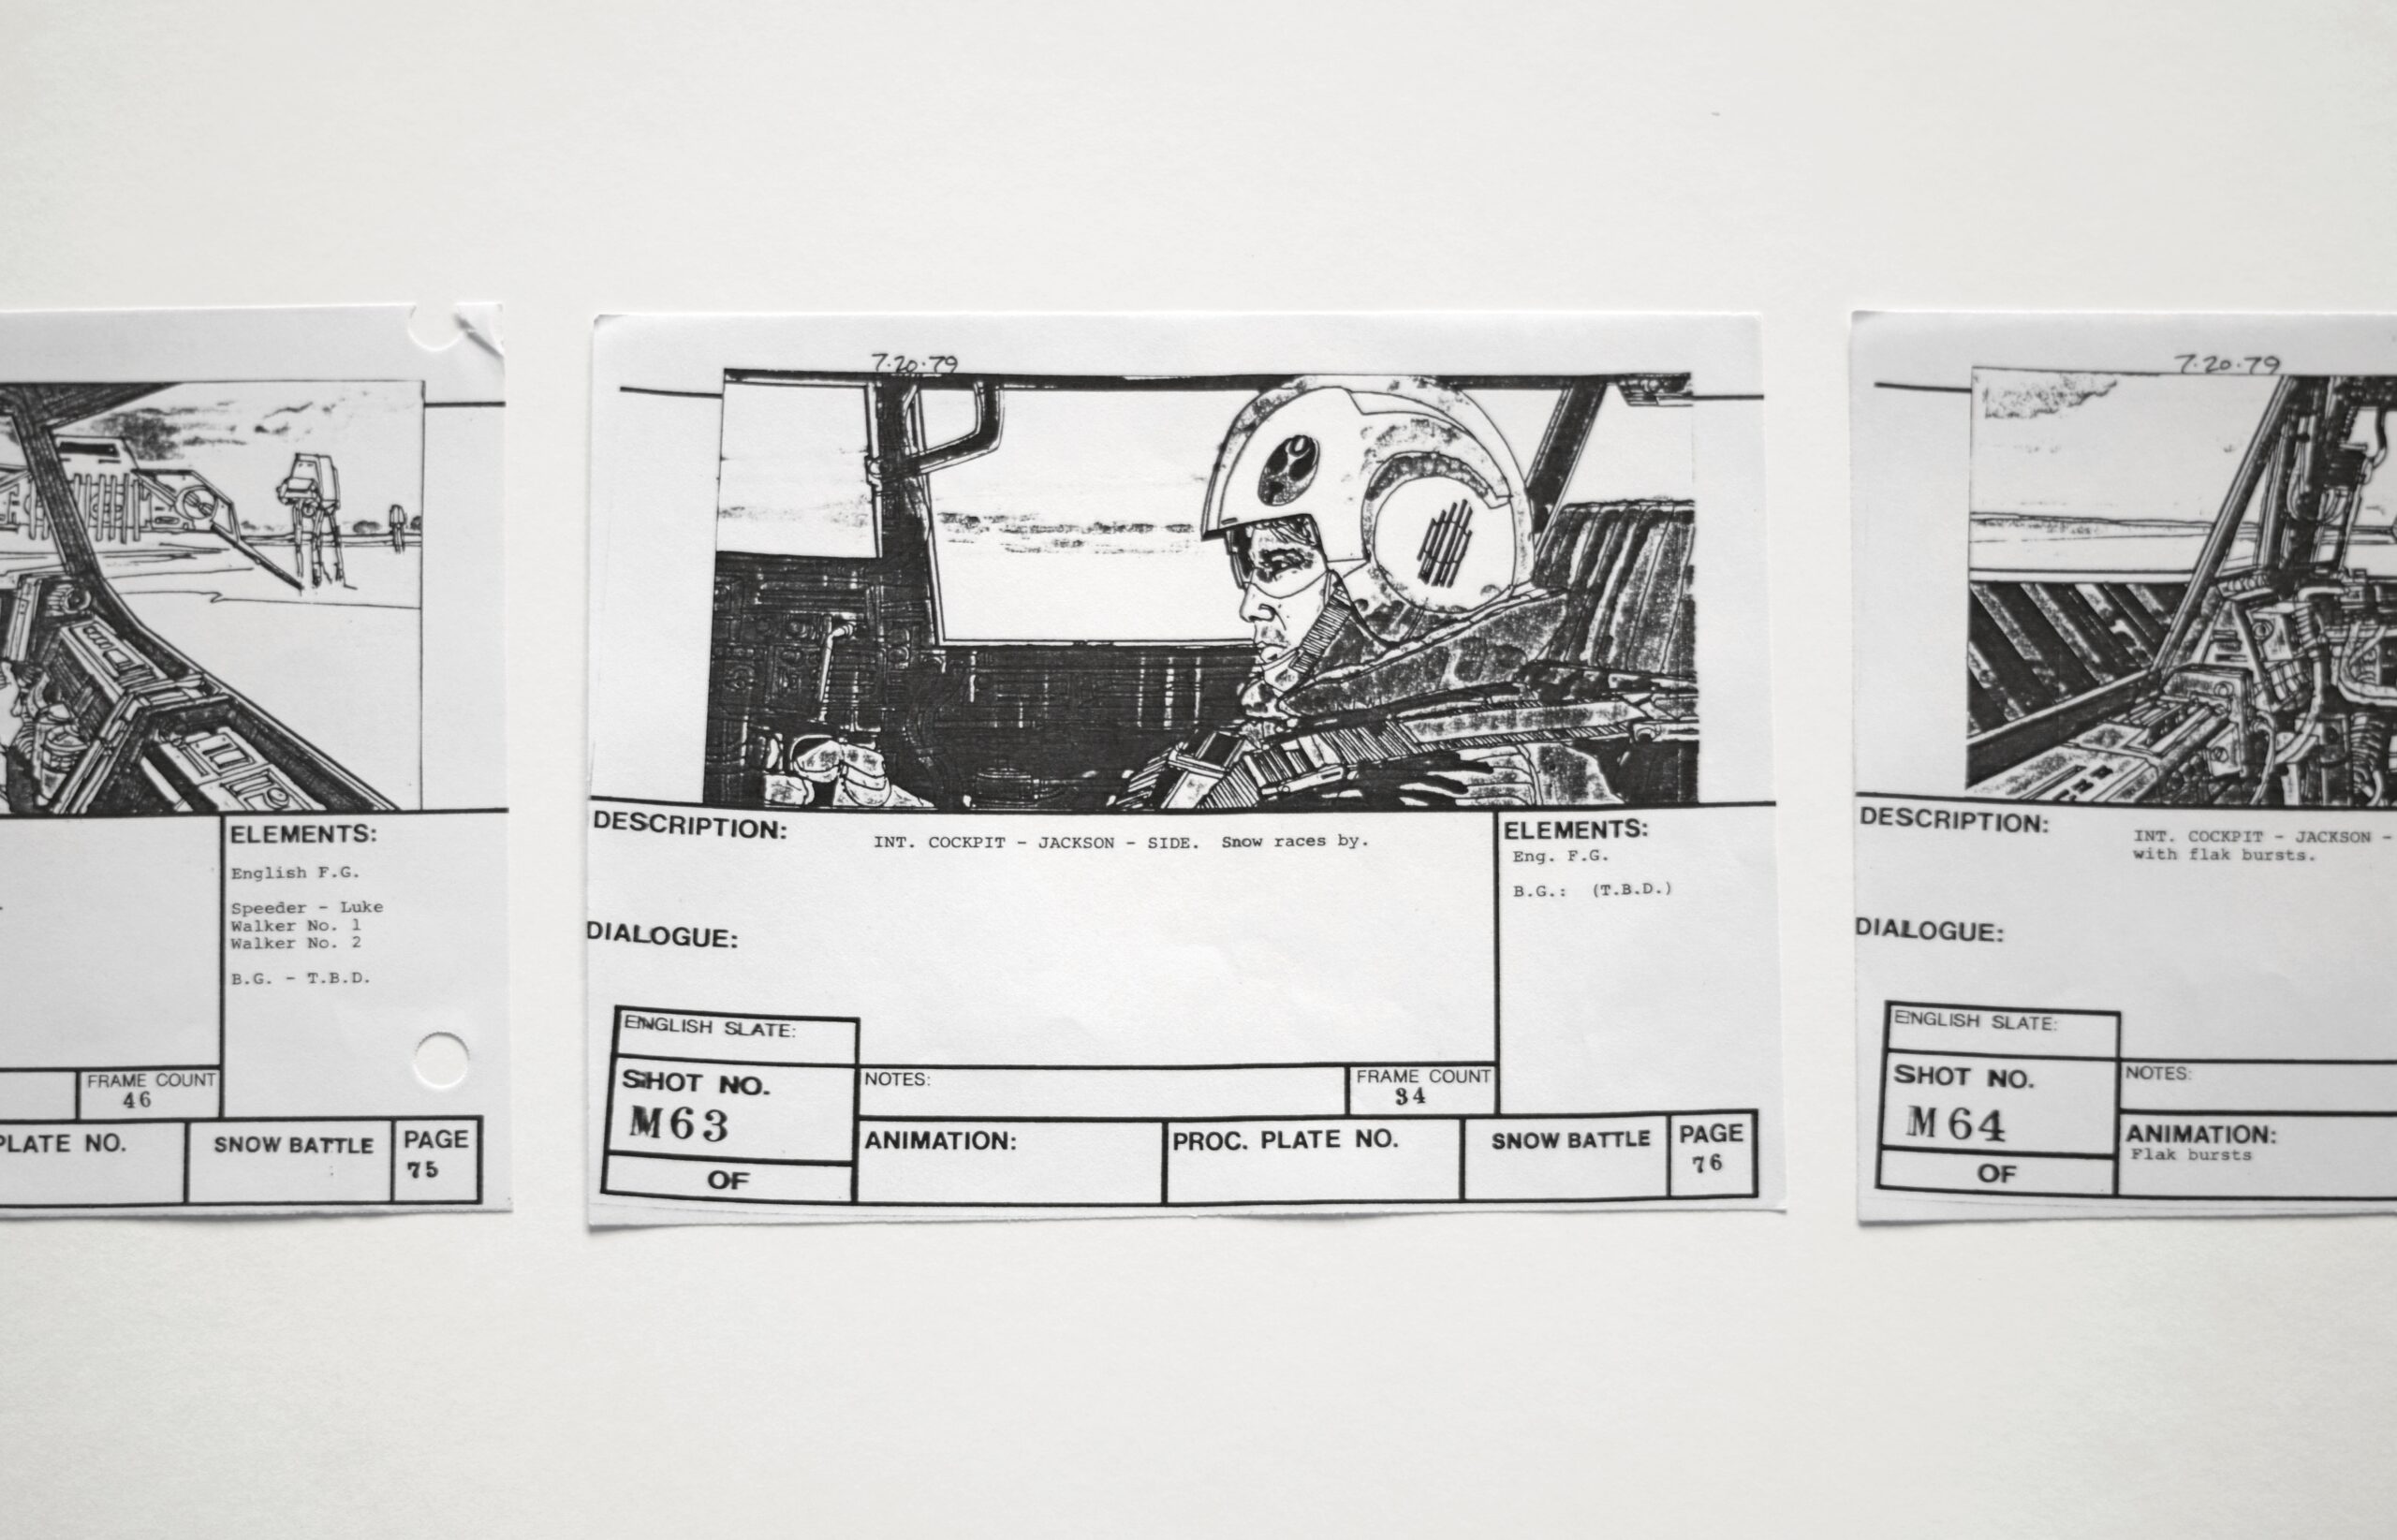
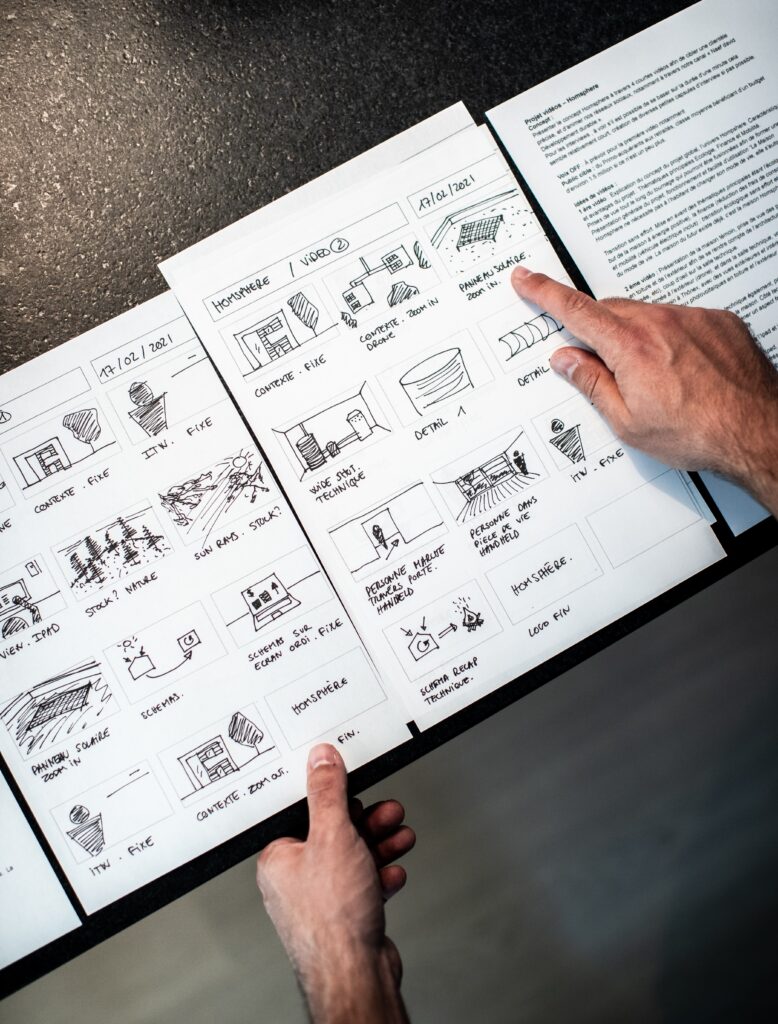
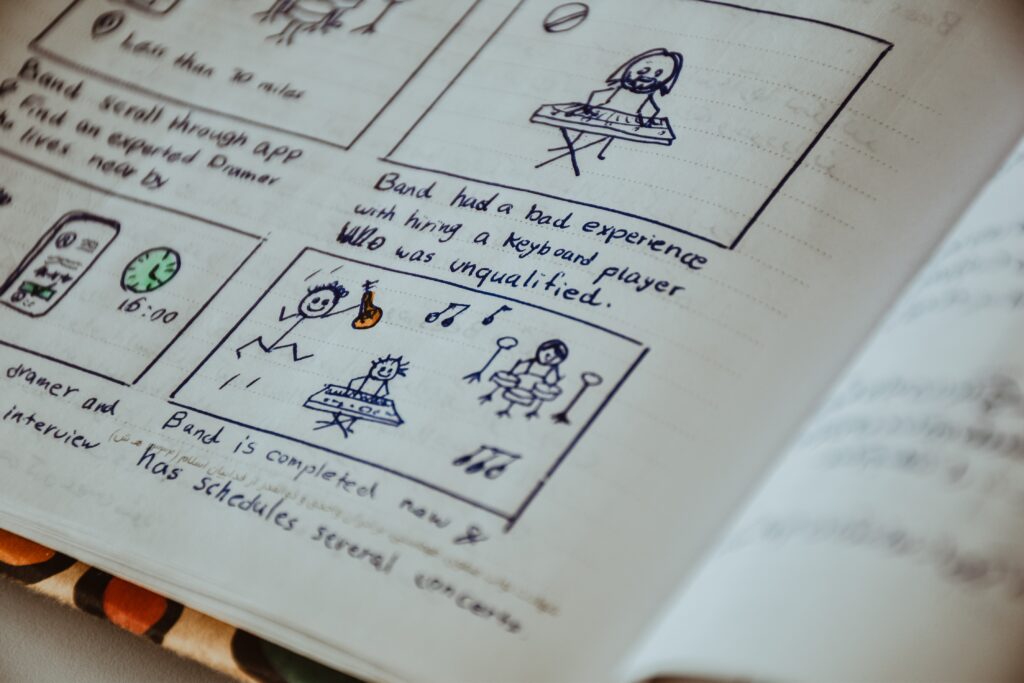
Storyboard:
- Storyboarding is the visual representation of your video's shots and scenes. You can use paper and pencil or digital tools to sketch each frame. Include notes or descriptions for each frame to convey the action, dialogue, and any important details.
Types of Camera Angles:
- Eye-Level: This is the most common angle, and it presents the subject as equals. It's neutral and often used for straightforward storytelling.
- Low Angle: Shooting from a lower point, this angle makes the subject appear larger and more dominant. It can convey power or superiority.
- High Angle: The camera is positioned above the subject, making them appear smaller and more vulnerable. It's often used to show weakness or submission.
- Dutch Angle (Canted Angle): The camera is intentionally tilted, creating a sense of imbalance or unease. It's used to evoke tension or disorientation.
- Bird's-Eye View: This is a top-down perspective, offering an overview of the scene. It's used to show the entire layout or create a feeling of detachment.
-
Developing a storyboard frame:
- Starting with a thumbnail sketch and ending with a detailed sketch that includes basic lighting, involves a step-by-step process. Here's a brief guide on how to do it:
-
Thumbnail Sketch (Thumbnailing):
- Begin by creating a small and rough thumbnail sketch of the scene. This initial sketch should be quick and simplified, focusing on the basic composition, camera angle, and placement of key elements (characters, props, etc.). It's meant to be a quick visual brainstorming stage.
-
Frame Structure:
- Decide on the frame's aspect ratio and proportions (e.g., 16:9 for standard video, 1.85:1 for film). This will determine the shape of your frame and how the visual elements fit within it. Within your chosen frame dimensions, draw a rectangular box to represent the viewfinder or screen. This box outlines the area you'll work within for your detailed sketch.
-
Layout and Composition:
- Use your thumbnail as a reference to refine the composition. Place the main elements (characters, objects) in the frame, considering their positions and interactions. Ensure a clear visual flow that tells the story effectively.
-
Camera Angle:
- Decide on the camera angle (e.g., eye-level, high-angle, low-angle) that best conveys the desired emotion or perspective for the scene. Indicate this angle within the frame.
-
Basic Shapes and Lines:
- Start by sketching basic shapes and lines to represent the key elements in the scene. Use simple shapes to represent people and objects. This helps establish their positions and movements.
-
Lighting and Shading:
- To add basic lighting to your sketch, consider the light source's position in the scene. Use hatching or shading to indicate areas of light and shadow. This will create depth and dimension in your frame.
-
Detailing:
- Gradually add more details to your sketch. Focus on refining the character's features, adding textures to objects, and incorporating any essential background elements. Pay attention to facial expressions and body language for characters.
-
Additional Notes & Dialogue:
- Include any relevant notes or annotations within the frame. These notes can describe camera movements, character actions, or other important details that are not apparent in the sketch. If there is dialogue or narration in the scene, write it in a caption or speech bubble near the corresponding character.
-
Color (Optional):
- If you plan to use color in your final video, you can indicate basic color schemes in your sketch. For example, you might use colored pencils or digital coloring to represent specific elements.
-
Final Review:
- Review your detailed sketch to ensure it effectively conveys the scene's mood, composition, and lighting. Make any necessary adjustments before moving on to the next frame.
Repeat this process for each frame in your storyboard sequence. As you progress from a thumbnail to a detailed sketch, your storyboard frames will become a comprehensive visual guide for your video project, helping you plan camera angles, composition, lighting, and narrative flow effectively.
-
-
Create a Shooting Schedule:
- Based on your shot list and storyboard, create a shooting schedule that outlines when and where you will capture each shot. Consider factors like weather, lighting conditions, and actor availability.
-
Plan Your Resources:
- Determine the equipment, props, and personnel you'll need for your shoot. In order to optimize efficiency and minimize delays or unexpected issues, make sure you have access to all necessary resources and equipment
-
Location Scouting:
- Visit the shooting locations in advance to assess lighting, acoustics, and any potential challenges. This will help you plan your shots more effectively.
-
Plan for Audio:
- Consider how you'll capture high-quality audio. This might involve using external microphones, audio recorders, or a dedicated sound operator.
-
Lighting and Framing:
- Think about how you'll light your scenes and how you'll frame your shots. Proper lighting and framing can significantly impact the visual quality of your video.
-
Create a Budget:
- Outline the budget for your project, including expenses for equipment rental, props, location fees, and any other costs associated with production. Because at this stage you might have to do some additional fundraising or edit down the project to eliminate some costs.
-
Edit and Revise:
- Review your storyboard and shot list to make sure everything aligns with your vision. Make any necessary adjustments before you start shooting.
-
Gather Feedback:
- Share your plan, script, and storyboard with colleagues or collaborators to get feedback and refine your ideas.
-
Execution:
- Once your planning is complete, begin the production phase. Follow your shot list and storyboard closely, and be prepared to adapt to unexpected challenges.
-
Post-Production:
- After shooting, use your storyboard as a reference during the editing process. Ensure the final video matches your original vision.


In summary, effective planning and storyboarding are essential for a successful video project. Above all they help you save time, and resources, and ensure that you convey your message clearly and engage your target audience.